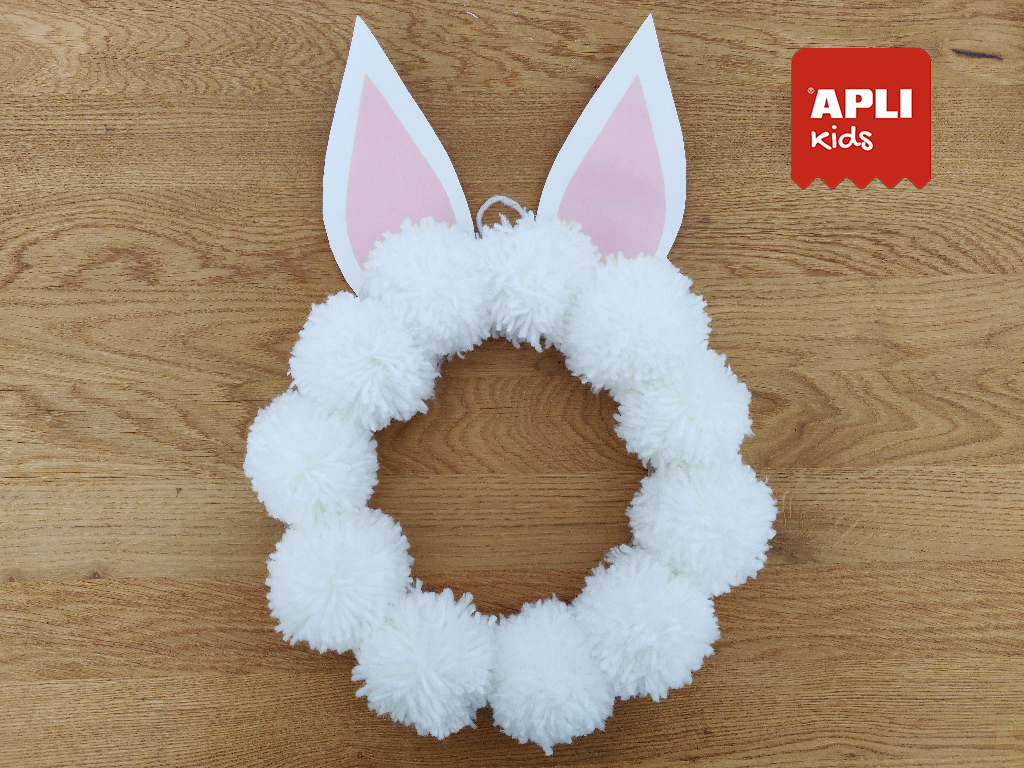
Decorate your room with this Easter bunny garland!

Easter bunnies are one of the most popular symbols of this time of the year. Finding the chocolate eggs that the Easter bunny has been hiding is an activity that both children and adults love.
But this year, we’ve brought you something different, a handicraft activity to decorate the house for this time of the year… An Easter bunny garland! A different activity that is perfect for doing with the family, simple, and with materials you’re sure to have at home.
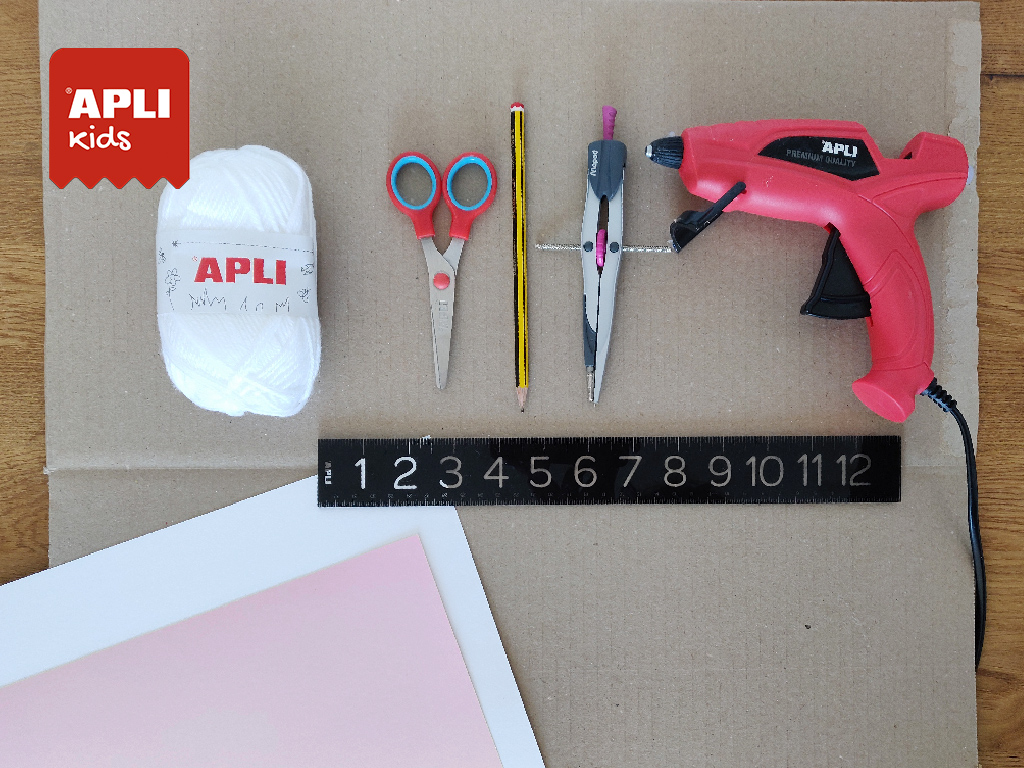
Prepare the materials that you will need:
-
Wool, either white or whatever color you prefer: To make the pom-poms that will be the Easter bunny’s hair.
-
Cardboard: To make the base of the garland.
-
White and pink card: To make the rabbit’s ears, or you can use EVA rubber instead.
- A pair of scissors
- A ruler, pencil and compass
Is everything ready? Let’s begin the handicraft!
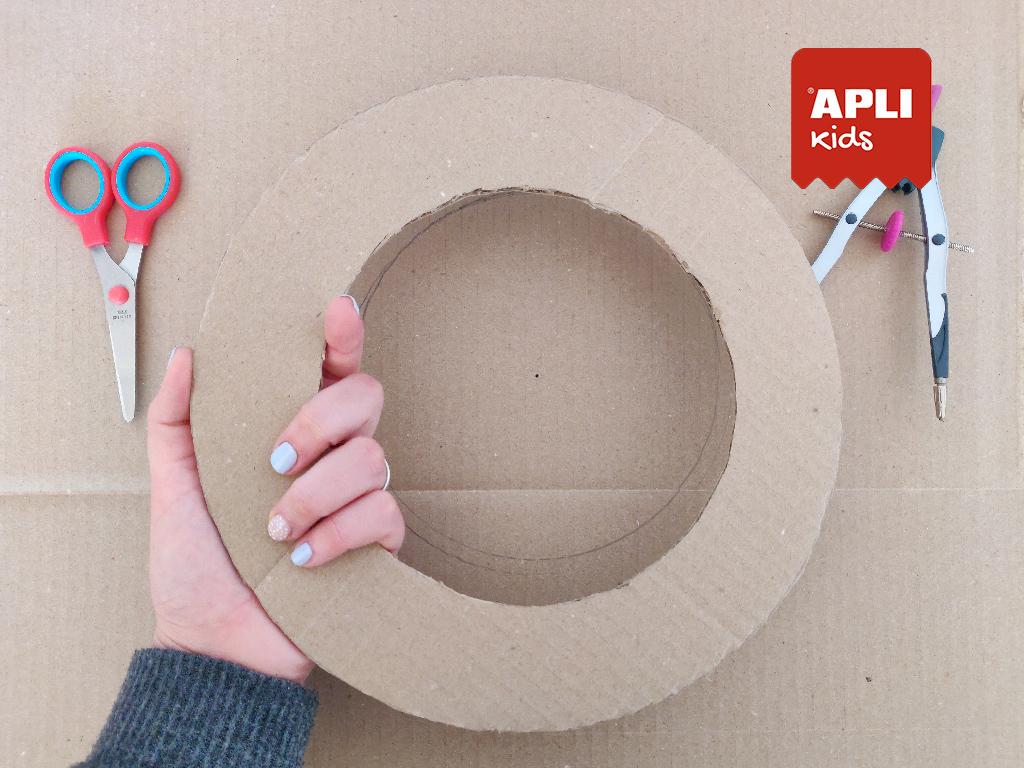
1. Prepare the base of the garland
For this, you will need a piece of cardboard, a compass and a pair of scissors. If you don’t have a compass, you can use two plates of different sizes. On the cardboard, draw a circle approximately 27 cm diameter and another inside it, of about 17 cm.
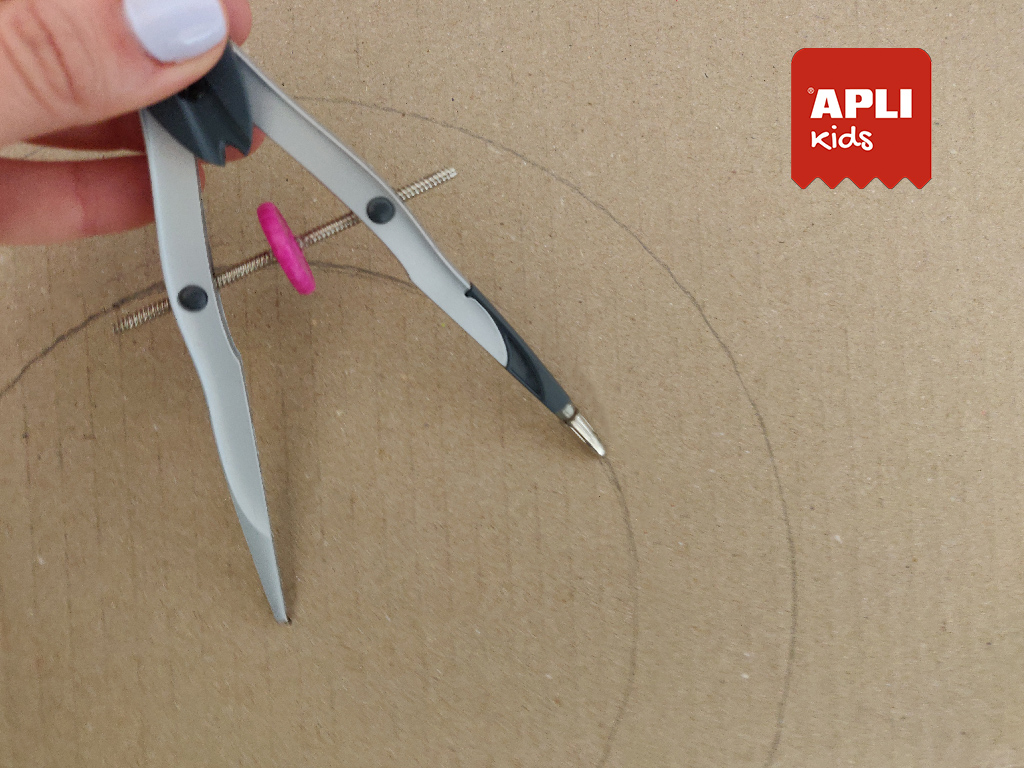
Cut out the circles to obtain a ring about 5 centimeters wide. If you find it difficult to cut the card with scissors, use a precision knife with an adult’s help.
Keep the cardboard circle for later.
2. Make the pom-poms with the wool
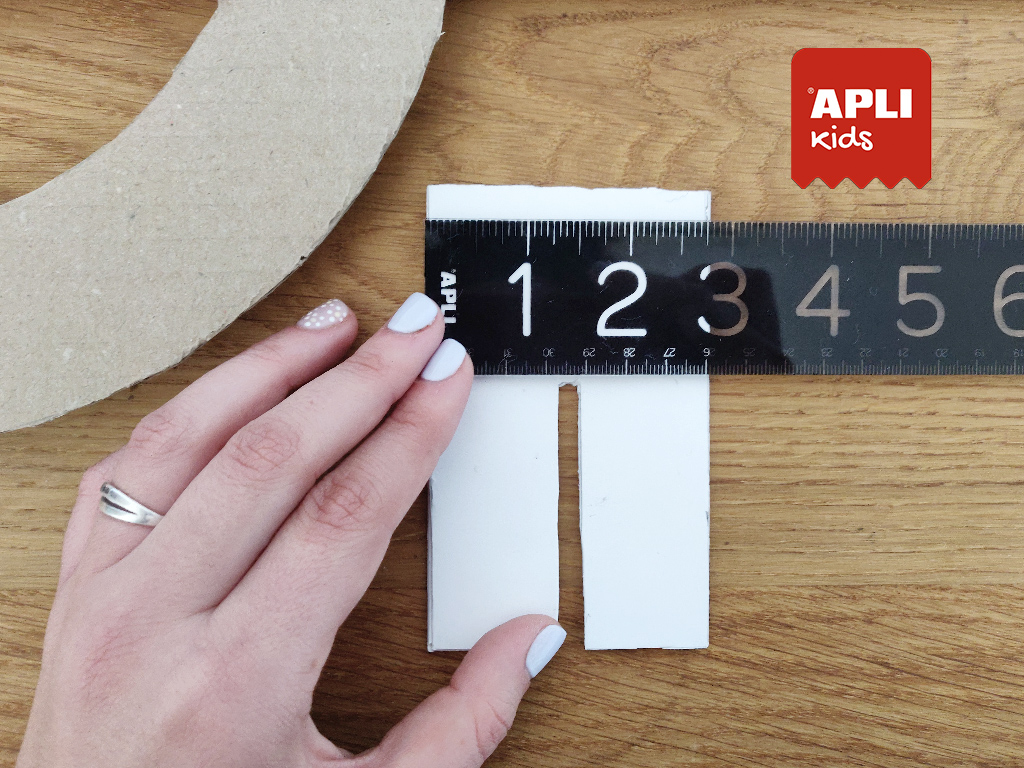
Before starting, let’s prepare a tool that will help you make perfectly symmetrical pom-poms of the same size.
Cut a rectangle of 7 x 11 cm from the cardboard leftover from the garland. Then make a vertical slit about 6 cm high and 1 cm wide in the middle of the cardboard.
With this, you can make pom-poms of about 7 cm diameter approximately. If you want to make pom-poms of other sizes, cut another piece of cardboard to the size you want.
Now you have made the tool, you can begin to make your pom-poms by winding the wool onto the end with the slit, do it carefully and without pulling it too tight.
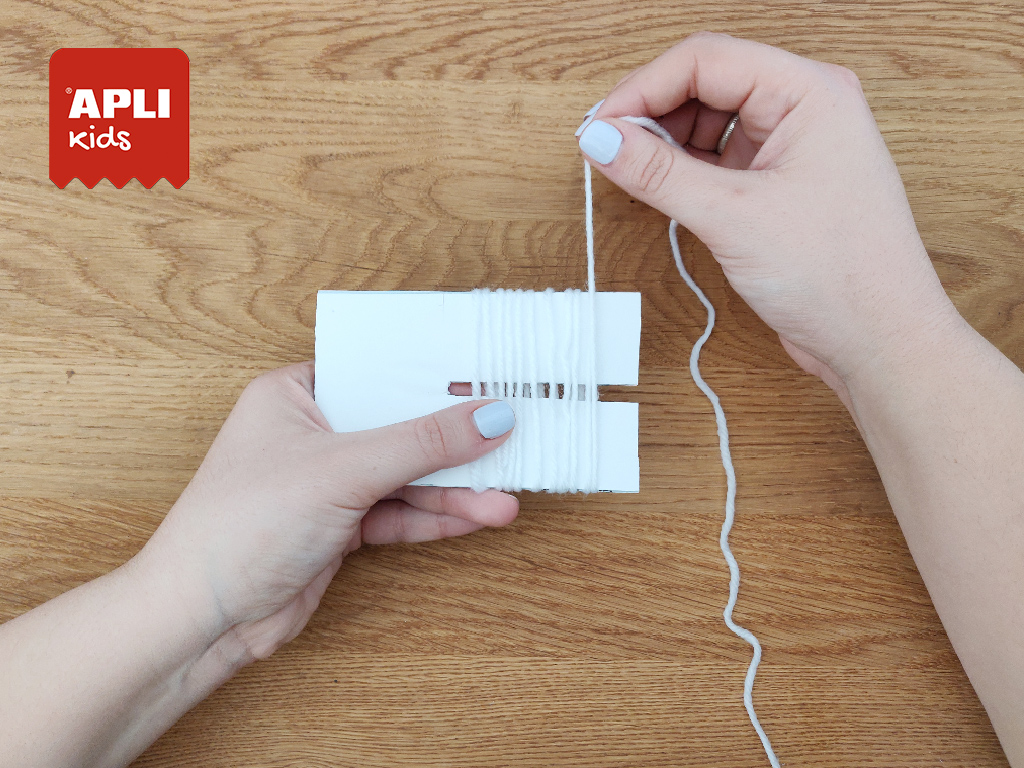
Wind the wool evenly, both in the center and at the ends. Do not cover the end of the slit completely. Continue winding until it’s as thick as you want; the thicker it is, the bushier the pom-poms will be.
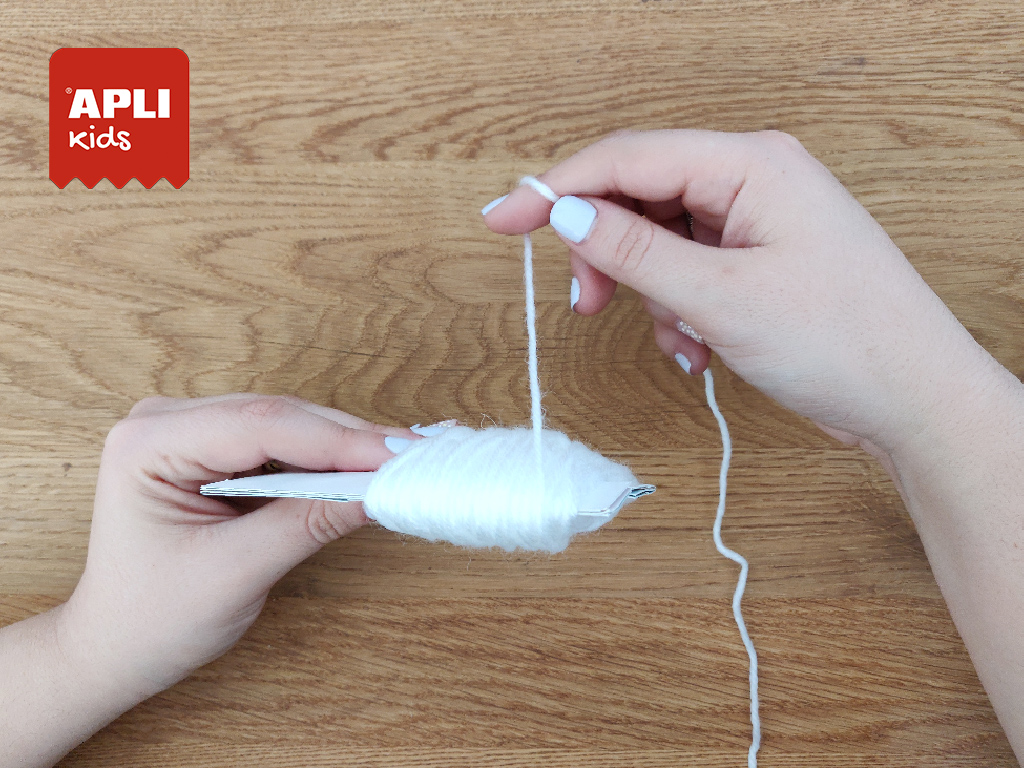
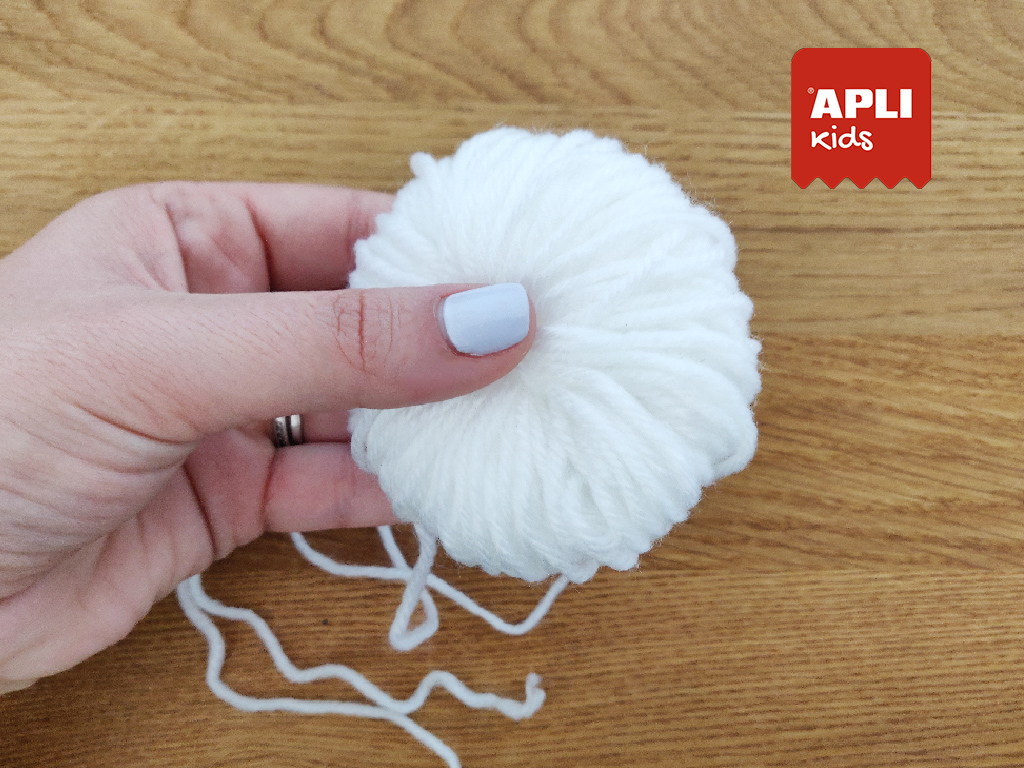
When you’ve wound all the wool to the thickness you want, cut a piece of thread and insert it through the hole in the cardboard and turn over the ball of wool.
Tie the thread, but not too tight; you will tighten the knot when you remove the wool from the card, do not make a double knot. Wind the thread a couple of times around the wool to make sure no thread has escaped.
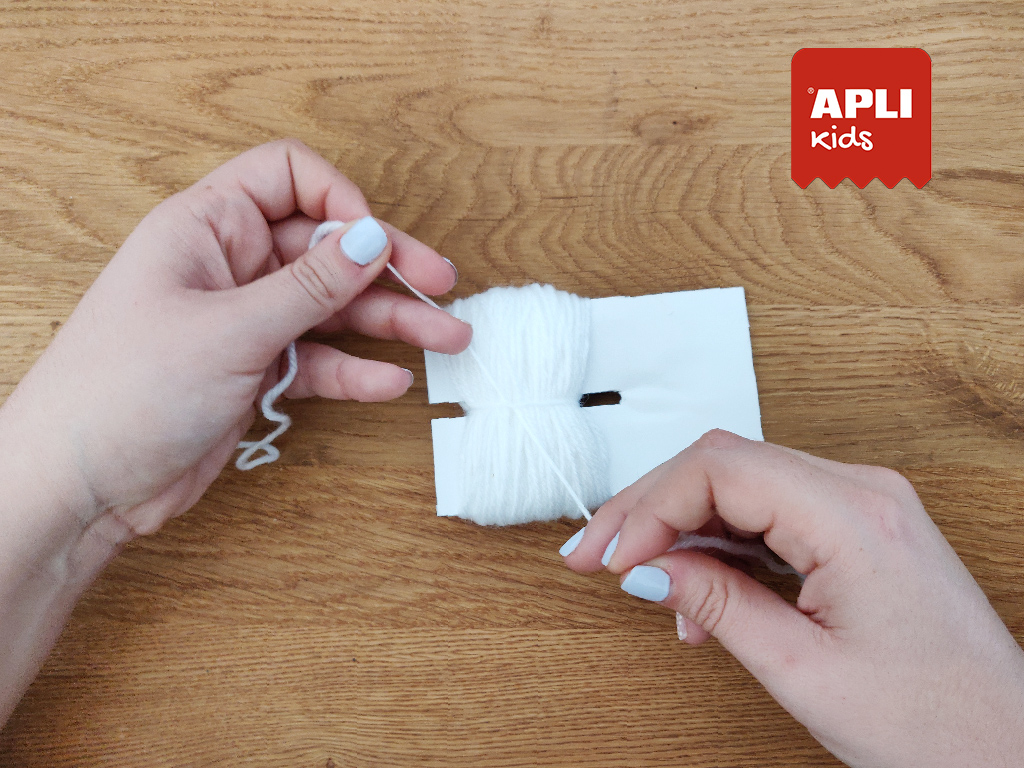
Now, once you’ve wound the thread around a couple of times and tied it, take the ball off the cardboard, pull the thread tight and make a double knot. You should have a ball looking like this:
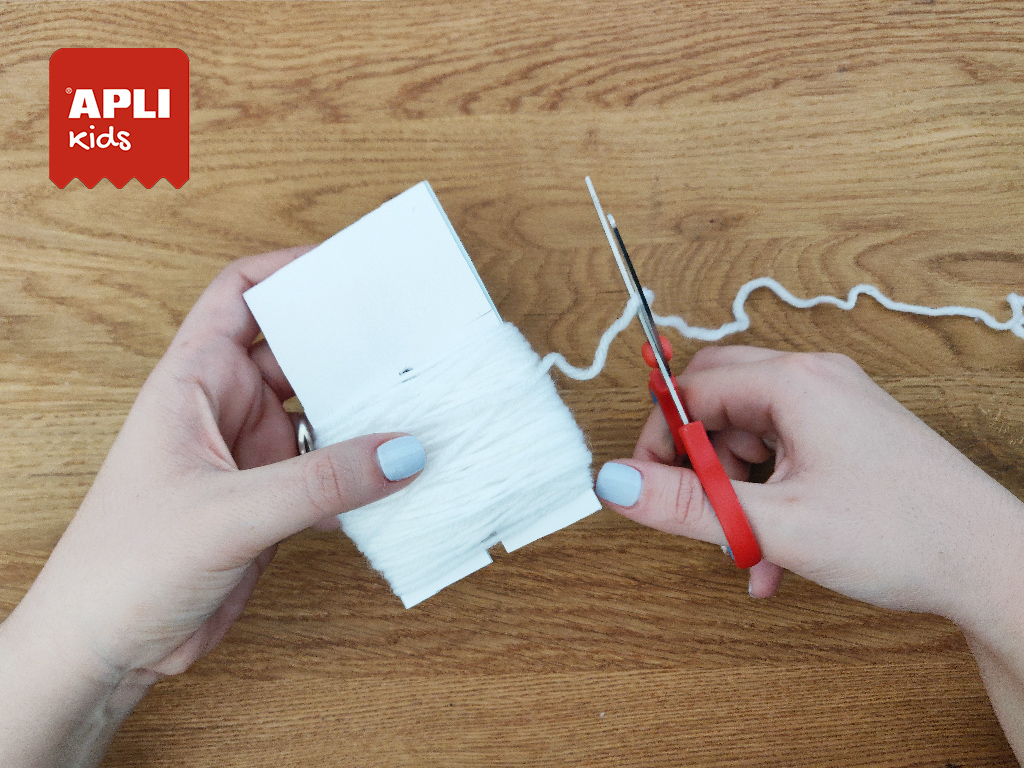
Now for the fun… Shaping the pom-pom with scissors! For this step, we recommend you put a bag or box under the pom-pom so as not to scatter wool all over the place.
Insert the scissors into the ball of wool and go around cutting. Be careful not to cut the thread in the center. Go little by little, making sure you leave no thread uncut.
Once the ends are cut, shape the pom-pom by trimming the longer threads, so the ball is rounder, bushier and uniform. Just trim any surplus thread with the scissors, little by little, until the pom-pom takes shape.

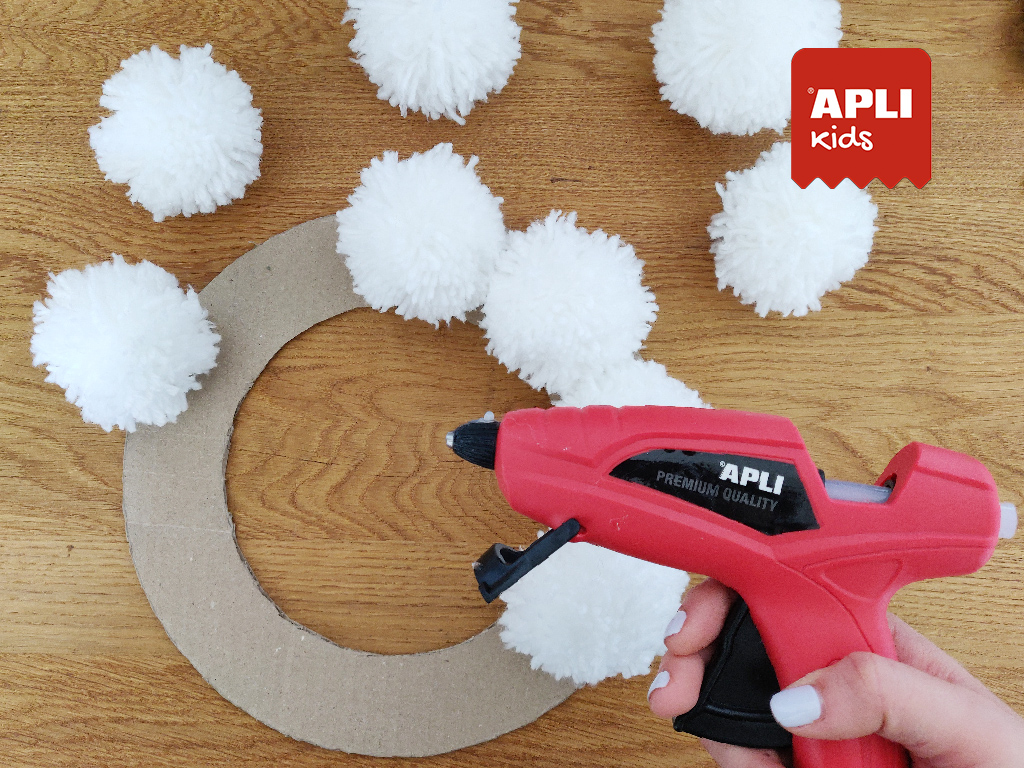
Repeat this step for all the pom-poms you need. For a garland of this size, you’ll need approximately 10-12 pom-poms.
3. Stick the pom-poms to the garland
Stick the pom-poms to the cardboard circle you made before, using a hot glue gun. Stick them close together so that the cardboard is not visible.
4. Make the bunny’s ears with card or EVA rubber
To make the ears, you’ll need white and pink card or EVA rubber.
Draw the shape of the bunny’s ear on the white card, cut it out and use it as a template for the other ear, so that they’ll be the same.
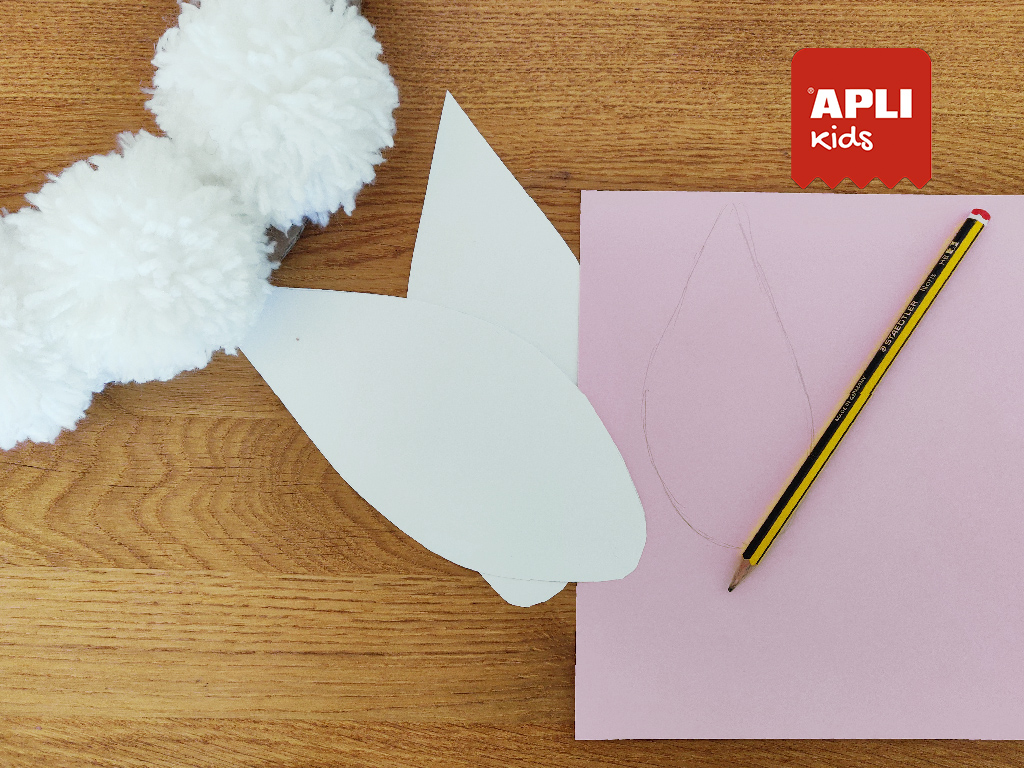
Do the same with the pink card, but smaller, as it will form the inside of the ear.
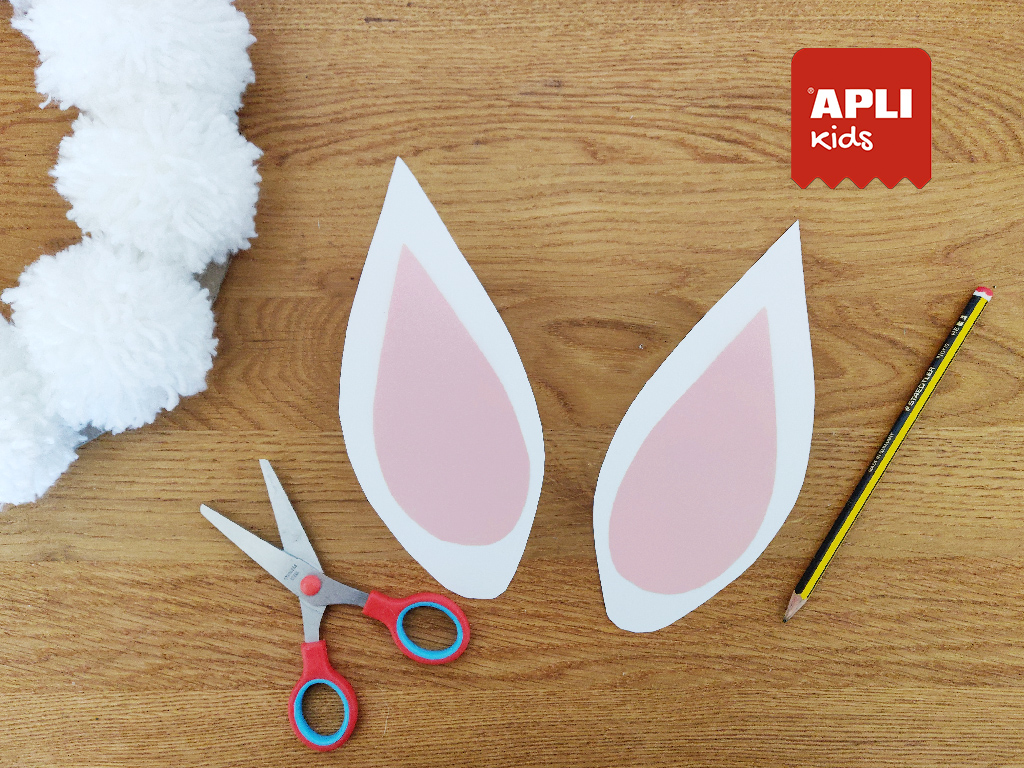
Cut out the ear shapes and stick the pink parts onto the white, making sure they’re centered.
5. Finish your garland
Stick the ears to the back part of the garland. Cut a piece of wool thread or string and stick it to the back of the garland as well, between the ears.
And that’s it! You now have an Easter bunny garland to decorate your room.
You can use your favorite colored wool to make pom-poms in different colors, decorate it with Easter eggs, etc. As we always say, Power to the imagination!
Did you like this? Remember to like us on social media when you do any of the handicraft on our blog. We’d love to see your creations!

